Setup Guide
Everything you need to get bookmoth running, from first install to first chapter.
What is bookmoth?
A desktop writing app for novels and long-form non-fiction. You bring your project, your voice, and your own AI provider. bookmoth learns how you write and keeps everything it produces within your style.
Take the weight out of the first draft with a guided brief and AI-drafted chapters, or import an existing manuscript and use bookmoth for editorial feedback, planning, and revision. Either way, you stay in control with a sidekick that knows what you're trying to do.
bookmoth doesn't include an AI model. You connect one (Anthropic, OpenRouter, Ollama, or LM Studio) and pay the provider directly. A full novel typically costs under $5 in usage. This guide walks you through setup.
Installing bookmoth
Purchase bookmoth from the store. You'll receive a serial key by email. Download the latest version from the download page.
Open the installer. On macOS, open the .dmg and drag bookmoth to Applications. On Windows, run the .exe installer.
Enter your serial key on first launch. This is the key from your purchase email. One key per machine. You can transfer it later from the settings.
Set up your AI provider. bookmoth needs an API connection to generate text. Choose one of the options below.
Connecting an AI provider
bookmoth doesn't come with an AI built in, and that's on purpose. Think of bookmoth as the studio: the desk, the drafting, the voice work, the planning. The AI is the engine that does the actual generating, and you bring your own. You choose which one, and you can swap it whenever you like.
This is also why bookmoth is a one-time purchase with no subscription. You pay your AI provider directly for what you use, usually a few dollars for a whole novel, and nothing more to us than the app itself. Your key, your account, your spend, all in your hands.
There are two kinds of provider, and you only need one to begin:
Cloud models (Anthropic, OpenRouter). The highest quality, nothing to install, pay only for what you use. Best for serious drafting. Anthropic's Claude is what we recommend for voice.
Local models (Ollama, LM Studio). Run entirely on your own computer: free to use, fully private, no internet required. Ideal if you want everything offline or under your own roof. They need a capable machine, and quality depends on the model you run.
Pick whichever suits you and follow its section below. You only need one to start.
You can also have the best of both. Hybrid mode keeps your chapter drafts on Claude, where quality matters most, and sends the lighter work (planning, summaries, quick edits) to a cheaper or local model. You get Claude-grade prose where it counts and a much smaller bill everywhere else. See Hybrid mode below.
Setting up Anthropic (Claude)
Anthropic's Claude models produce the highest quality output. This is the recommended setup for serious drafting.
Go to console.anthropic.com and create an account if you don't have one.
Navigate to API Keys and create a new key. Copy it.
In bookmoth, click API / LLM in the top right. Select Cloud mode.
Paste your API key and save.
Setting up OpenRouter
OpenRouter gives you access to multiple AI models (Claude, GPT, Gemini, open-source models) through a single API key. Often cheaper than direct Anthropic access.
Go to openrouter.ai and create an account.
Navigate to Keys and create a new API key. Copy it.
In bookmoth, click API / LLM. Select Custom Endpoint.
Enter the endpoint URL:
Enter the model name in the model field. Use the OpenRouter model ID, e.g. zhipu-ai/glm-5, anthropic/claude-sonnet-4, or deepseek/deepseek-r1. You can find model IDs on the OpenRouter models page.
Paste your OpenRouter API key in the key field and save.
zhipu-ai/glm-5 offers excellent voice fidelity at a fraction of the cost of Opus. See the model field in bookmoth's API settings to set your preferred model per project.
Setting up Ollama (local, offline)
Run AI models entirely on your machine. No internet needed, no API costs. Requires a reasonably powerful computer (16GB+ RAM recommended).
Install Ollama from ollama.com.
Open Terminal (macOS) or Command Prompt (Windows) and pull a model:
Start the Ollama server if it's not already running:
In bookmoth, click API / LLM. Select Custom Endpoint.
Enter the endpoint URL:
Enter your model name exactly as it appears in Ollama. To check, run ollama list in terminal and use the name from the left column (e.g. llama3, mistral, qwen2.5).
Leave the API key field blank. Save.
Setting up LM Studio (local, offline)
LM Studio provides a visual interface for downloading and running local models. Good if you prefer a GUI over the command line.
Download LM Studio from lmstudio.ai.
Search for and download a model inside LM Studio (the Discover tab). You can paste a HuggingFace model ID here to fetch it directly.
Go to the Developer tab and click Start Server.
In bookmoth, click API / LLM. Select Custom Endpoint.
Enter the endpoint URL:
Enter the model name as shown in LM Studio's Developer tab (it appears at the top of the server panel once loaded).
Leave the API key field blank. Save.
Using Hybrid mode
Hybrid mode splits your API calls between Anthropic and your Custom Endpoint based on how demanding the task is. Quality-critical work stays on Claude. Everything else runs through your cheaper or local provider.
Heavy tasks always use Anthropic (Claude): chapter drafting, writing profile generation, editor chat, polish and voice revision. These are the calls where output quality matters most.
Medium and light tasks try your Custom Endpoint first: scene generation, chapter summaries, codex extraction, inline edits, slash commands. If the custom endpoint fails or is unreachable, bookmoth silently falls back to Anthropic. You never see an error.
Enter your Anthropic API key in the top section of API / LLM settings.
Select a provider tab (OpenRouter, Ollama, LM Studio, or Custom) and enter your model name and API key if needed.
Click Test connection on both Anthropic and your custom endpoint to verify they're working.
Select Hybrid mode.
Advanced model routing
For most users, the standard routing modes (Cloud, Hybrid, Custom) are all you need. Advanced routing is for writers who want finer control over which model handles which type of task.
In API / LLM settings, click Advanced model routing below the mode selector. This opens a panel where you can assign a different model to each of bookmoth's three task tiers:
Heavy tasks: chapter drafting, writing profile generation, editor chat, polish pass. These prompts are long, complex, and quality-critical. Use a frontier API model or a local model with 70B+ parameters. Smaller models will produce poor output or fail entirely.
Medium tasks: scene generation, chapter summaries, codex extraction, brief drafting. Structured output that needs good reasoning but not frontier-level prose. 14B+ parameters recommended.
Light tasks: inline edits, slash commands, quick classification. Speed matters more than depth. 7B+ parameters is fine.
Leave any tier blank and it uses your default model from the main settings. This means you only need to fill in the tiers you want to override.
A common setup for local users running Ollama: assign a large model like qwen2.5:72b to Heavy, a mid-size model like qwen2.5:14b to Medium, and a fast model like llama3:8b to Light. Same endpoint, three different models, each matched to the task.
The advanced panel also includes a timeout setting. bookmoth sets sensible defaults per provider (2 minutes for OpenRouter, 30 minutes for local models), but you can override it here if you need more or less time.
Your first project
Once your AI provider is connected, you're ready to start.
Create a new project from the sidebar. Give it a name.
Talk to the Editor. The Brief tab opens a guided conversation. Tell the Editor about your novel: premise, characters, tone, world. The more you put in here, the better your chapters will be.
Add your writing examples. Click Writing Examples and paste in a few pages of your own prose. bookmoth analyses this to build your voice profile.
Generate your writing profile. Once you have a brief (at least 500 words) and writing examples, bookmoth creates a long-form voice profile that governs every draft.
Plan your chapters. Use the Chapter Plan tab to create your structure, or let the Editor help you map it out.
Write. Select a chapter in the Manuscript tab and click Write Chapter. Your first draft will be governed by your brief and your voice profile.
## Chapter 1) work too. Coming from Scrivener? Compile to Plain Text using the default preset.
The Editor
The Editor is the chat panel on the right side of the Brief tab. It's a guided conversation that helps you build and refine your project. Think of it as a developmental editor on call.
The Editor can see your whole project, the brief, writing profile, chapter plan, scene breakdowns, the Codex, and any chapter you load for review, and it can talk about any of it. When it proposes changes to a document, it summarises what it wants to do and asks for confirmation before applying anything.
You can use the Editor at any stage of your project:
Early on: describe your premise, characters, tone. The Editor asks follow-up questions to deepen your brief. The richer this gets, the better everything downstream works.
Chapter planning: ask the Editor to map out your chapter structure. It outputs chapter titles, summaries, and act assignments directly into your chapter plan.
Mid-project: need to change a character's arc, adjust tone, or restructure? Tell the Editor. It makes surgical edits to the relevant documents without rewriting everything else.
When you're stuck: ask it what to do next. It knows where you are in the project and points you at the next sensible step.
After drafting: use "Ask the Editor" on any chapter for editorial feedback: pacing, voice, structure, dialogue, whatever you want a second opinion on.
The CodexBeta
The Codex is your story bible: the characters, places, objects, and lore that make up your world. It keeps track of who is who, and feeds the right details to the AI as you write, so your cast stays consistent from the first chapter to the last. Crucially, it does most of the building for you, and it only sends the AI what each chapter actually needs.
This section is the long version: how the Codex works, what every toggle does, and the handful of habits that keep it accurate. If you read one part, make it the risk of accepting everything.
Where to find it
The Codex is one of the main tabs along the top of a project (it's labelled Codex on novels, Research on shortform pieces). Open it and you get a workbench: type tabs across the top, your entries listed beneath, and the selected entry open for editing on the right. The type tabs are Characters, Places, Objects, and Lore, so a large cast stays sorted.

It builds itself
You don't have to fill in forms. After you draft or import a chapter, bookmoth reads it and suggests new entries and updates: a character who just appeared, a place that was named, a detail that changed. The suggestions collect in a review queue. You accept, edit, or reject each one. Nothing is added to your Codex without your say-so. The point is to spare you the bookkeeping, not to take the decisions away from you.
Two things drive this: Auto-scan new drafts, which reads each chapter as you draft it, and the Scan chapters… button, which reads chapters on demand. Both are covered below. Both only ever propose. They never write to the Codex directly.
What an entry holds
Every entry has a name, a type (character, place, object, or lore), and a description. For most entries, that's all you need. The description is the part the AI reads most, so keep it tight and current. When you want more, an entry can also carry:
- Aliases. Nicknames, first names, titles. bookmoth recognises a character however you refer to them, so "Marty", "Mr Cleaver", and "Martin" all point to the same person. Aliases also drive mention detection (see below) and they're the fix for duplicates: if bookmoth ever creates two entries for the same character (say "Barnaby" and "Barnaby Trewint"), add the shorter name as an alias on the main entry, then delete the duplicate.
- Details. Structured facts, like a character sheet: Appearance, Personality, Voice, Background, Arc, plus any rows you add yourself. Each detail has its own AI-visible switch, so you can keep, say, a Voice note that the AI uses while hiding a Background note that's just for you. Add only what's useful.
- Relations. Links to other entries. Link a captain to their ship, and whenever the captain is pulled into a chapter, the ship comes along too (one level deep, so the ship's own relations don't cascade in).
- Tags. Your own labels for filtering and grouping entries. Tags are for you. They're never sent to the AI.
- Research. Notes you want to keep but never want the AI to see. Spoilers, scratch ideas, things you're still deciding. Never sent, whatever an entry's other settings say.
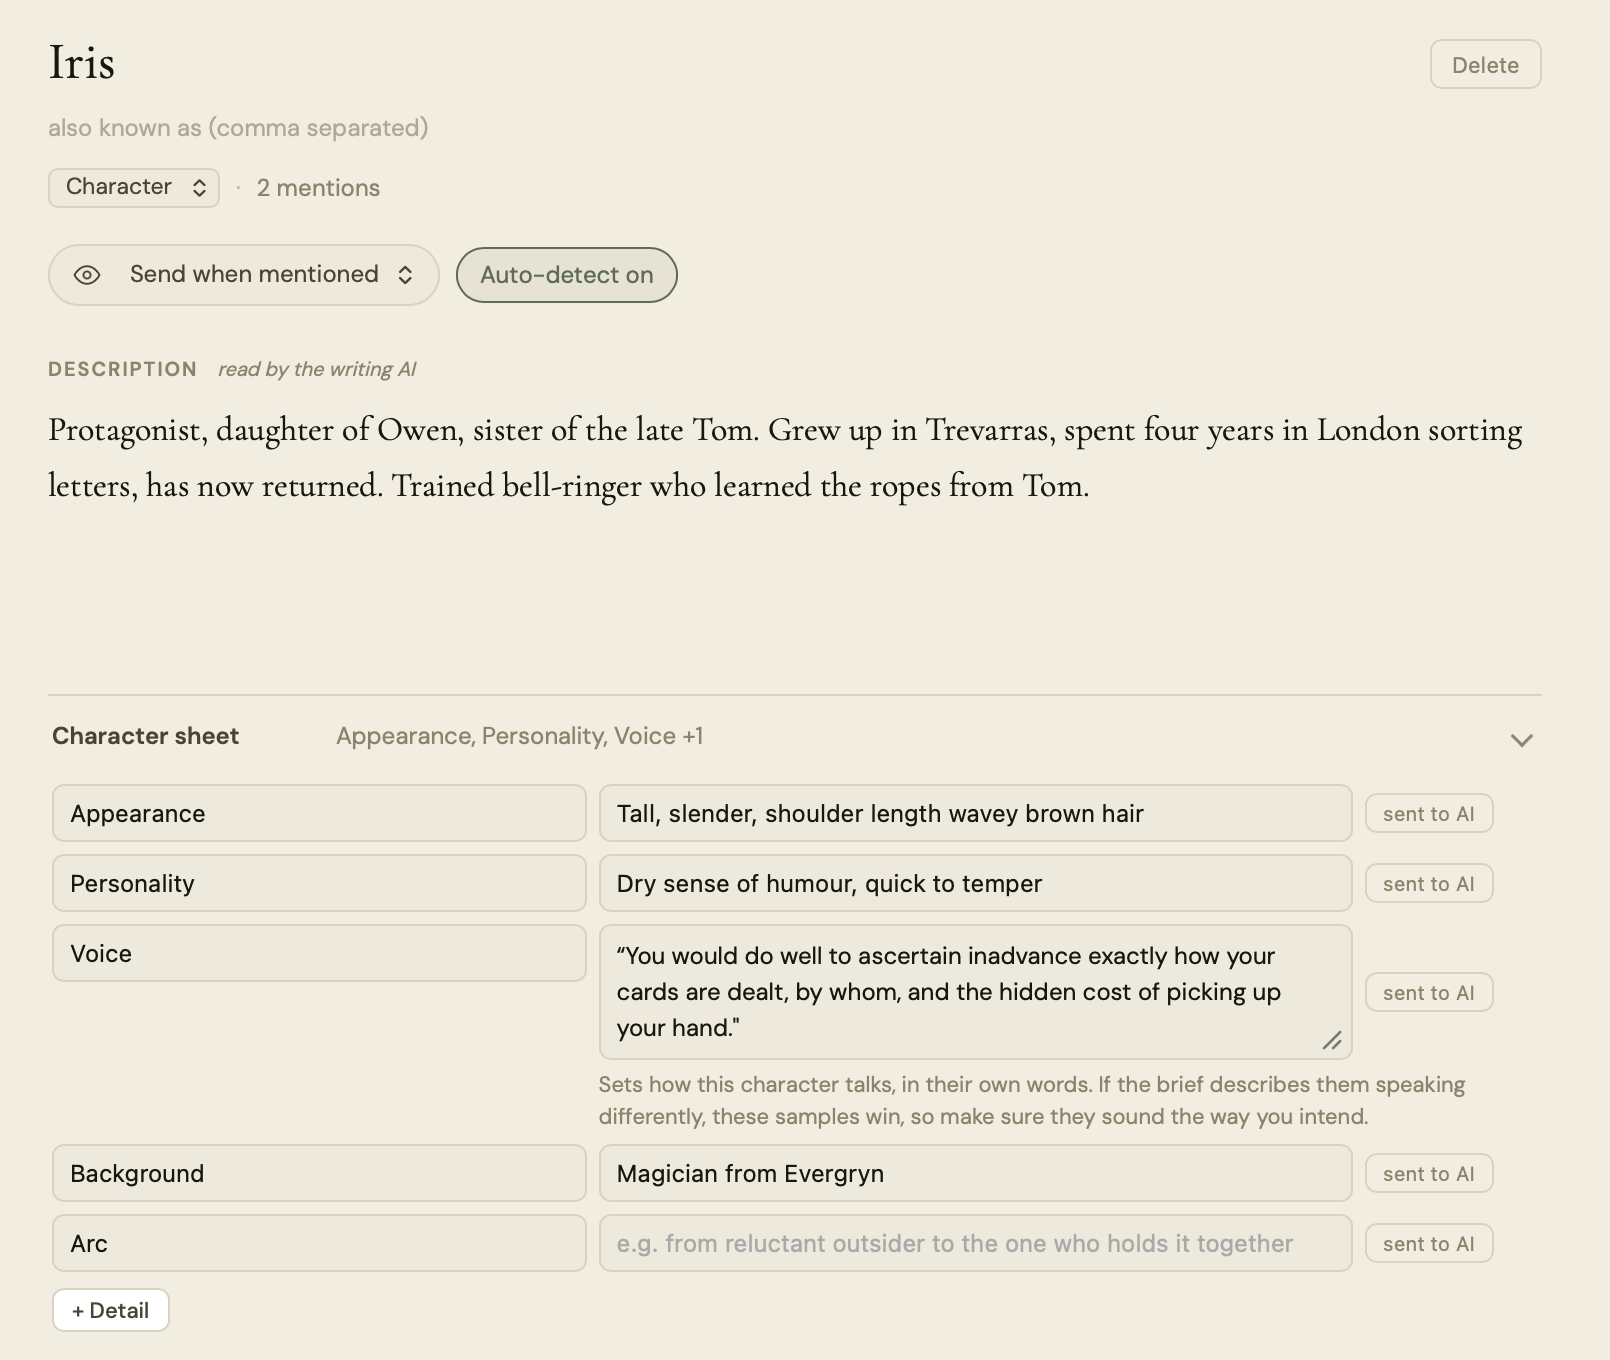
When the AI sees an entry: the send setting
You don't want every entry sent to the AI on every chapter. That wastes context and money, especially on smaller local models with tight context windows. So each entry has one setting that decides how often it's handed to the writing AI:
| Setting | What it does | Use it for |
|---|---|---|
| Send always | Included in every chapter bookmoth drafts. | Your three to six core entries: the protagonist, a central rule of the world, the thing that matters everywhere. |
| Send when mentioned | Included only in chapters where its name or an alias appears. The default. | Almost everything: the wider cast, places, objects that come and go. |
| Never send | Kept in your Codex for your reference, never handed to the AI. | Spoilers, placeholders, entries you're still deciding on. |
You set this once per entry and largely forget it. The default, Send when mentioned, is right for the great majority of entries.
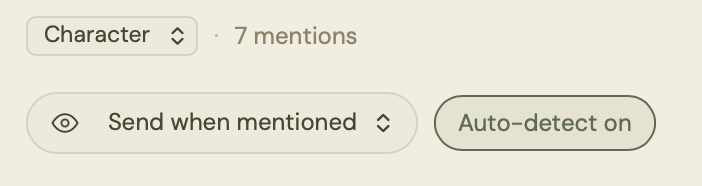
Auto-detect vs Send when mentioned
These two get confused, so here's the difference plainly.
Send when mentioned is the policy: it says "only include this entry in chapters that actually feature it." Auto-detect is the mechanism that powers that policy: it's how bookmoth decides whether an entry is featured. With Auto-detect on (the default for any "when mentioned" entry), bookmoth watches the chapter's plan, its summary and scene beats, for the entry's name or any alias, matching whole words only. Find a match, include the entry. No match, leave it out.
Turn Auto-detect off and the entry stays on "Send when mentioned", but bookmoth stops watching the text for it. In practice that means the entry only rides into a chapter when it's a relation of another included entry. You'd do this when a name is too common to match cleanly:
- A character literally called Will, Hope, May or Art, where the name collides with ordinary words and would otherwise pull the entry into chapters that never feature the character.
- A place called The Bridge or The Wall, same problem.
- An entry you only ever want to appear alongside a specific character, handled through a relation rather than its own name.
So: Send when mentioned decides whether bookmoth includes entries by mention at all; Auto-detect decides whether this particular entry takes part in that. Most entries leave both on and never think about it.
The two Codex-wide toggles
At the top of the Codex, next to the Scan button, sit two switches that apply to the whole project rather than a single entry:
- Auto-scan new drafts (on by default). After bookmoth finishes drafting a chapter, it quietly reads that chapter and drops any new entries or updates into the review queue. You'll see the "suggestions to review" count tick up. Nothing is saved until you accept it. Turn this off if you'd rather scan manually, or to keep things quiet while you draft a long run of chapters.
- Pause mention tracking (off by default). When paused, bookmoth stops auto-including entries based on mentions across the whole project. Entries set to Send always still go. This is a temporary lever for cutting context and cost, or for troubleshooting, not something to leave on, since it switches off the behaviour that keeps your cast consistent.
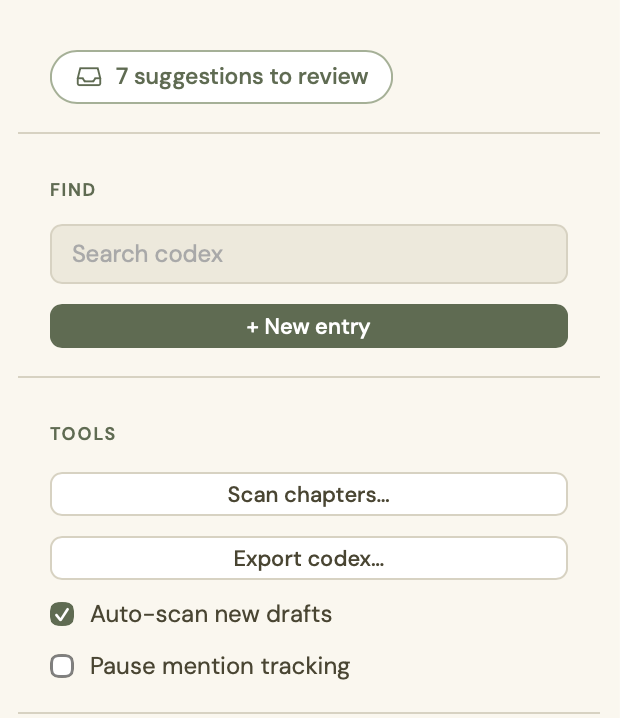
Scan chapters
Scan chapters… is the manual version of auto-scan, for when you want to read a batch of chapters in one go. Click it and bookmoth opens a picker listing every chapter that has enough text to read. Tick the ones you want (Select all and Deselect all are there), and it reads each in turn.
Under the hood, a scan makes one AI call per chapter, on the medium task tier, reading the real prose (or, for an imported project with no drafts yet, the chapter's continuity notes). It returns two kinds of suggestion: brand-new entries, and updates to entries you already have. Everything lands in the review queue. As with auto-scan, nothing is written to the Codex until you accept it.
The most useful single moment to scan is straight after importing an existing manuscript: one pass seeds your whole Codex from prose you've already written.

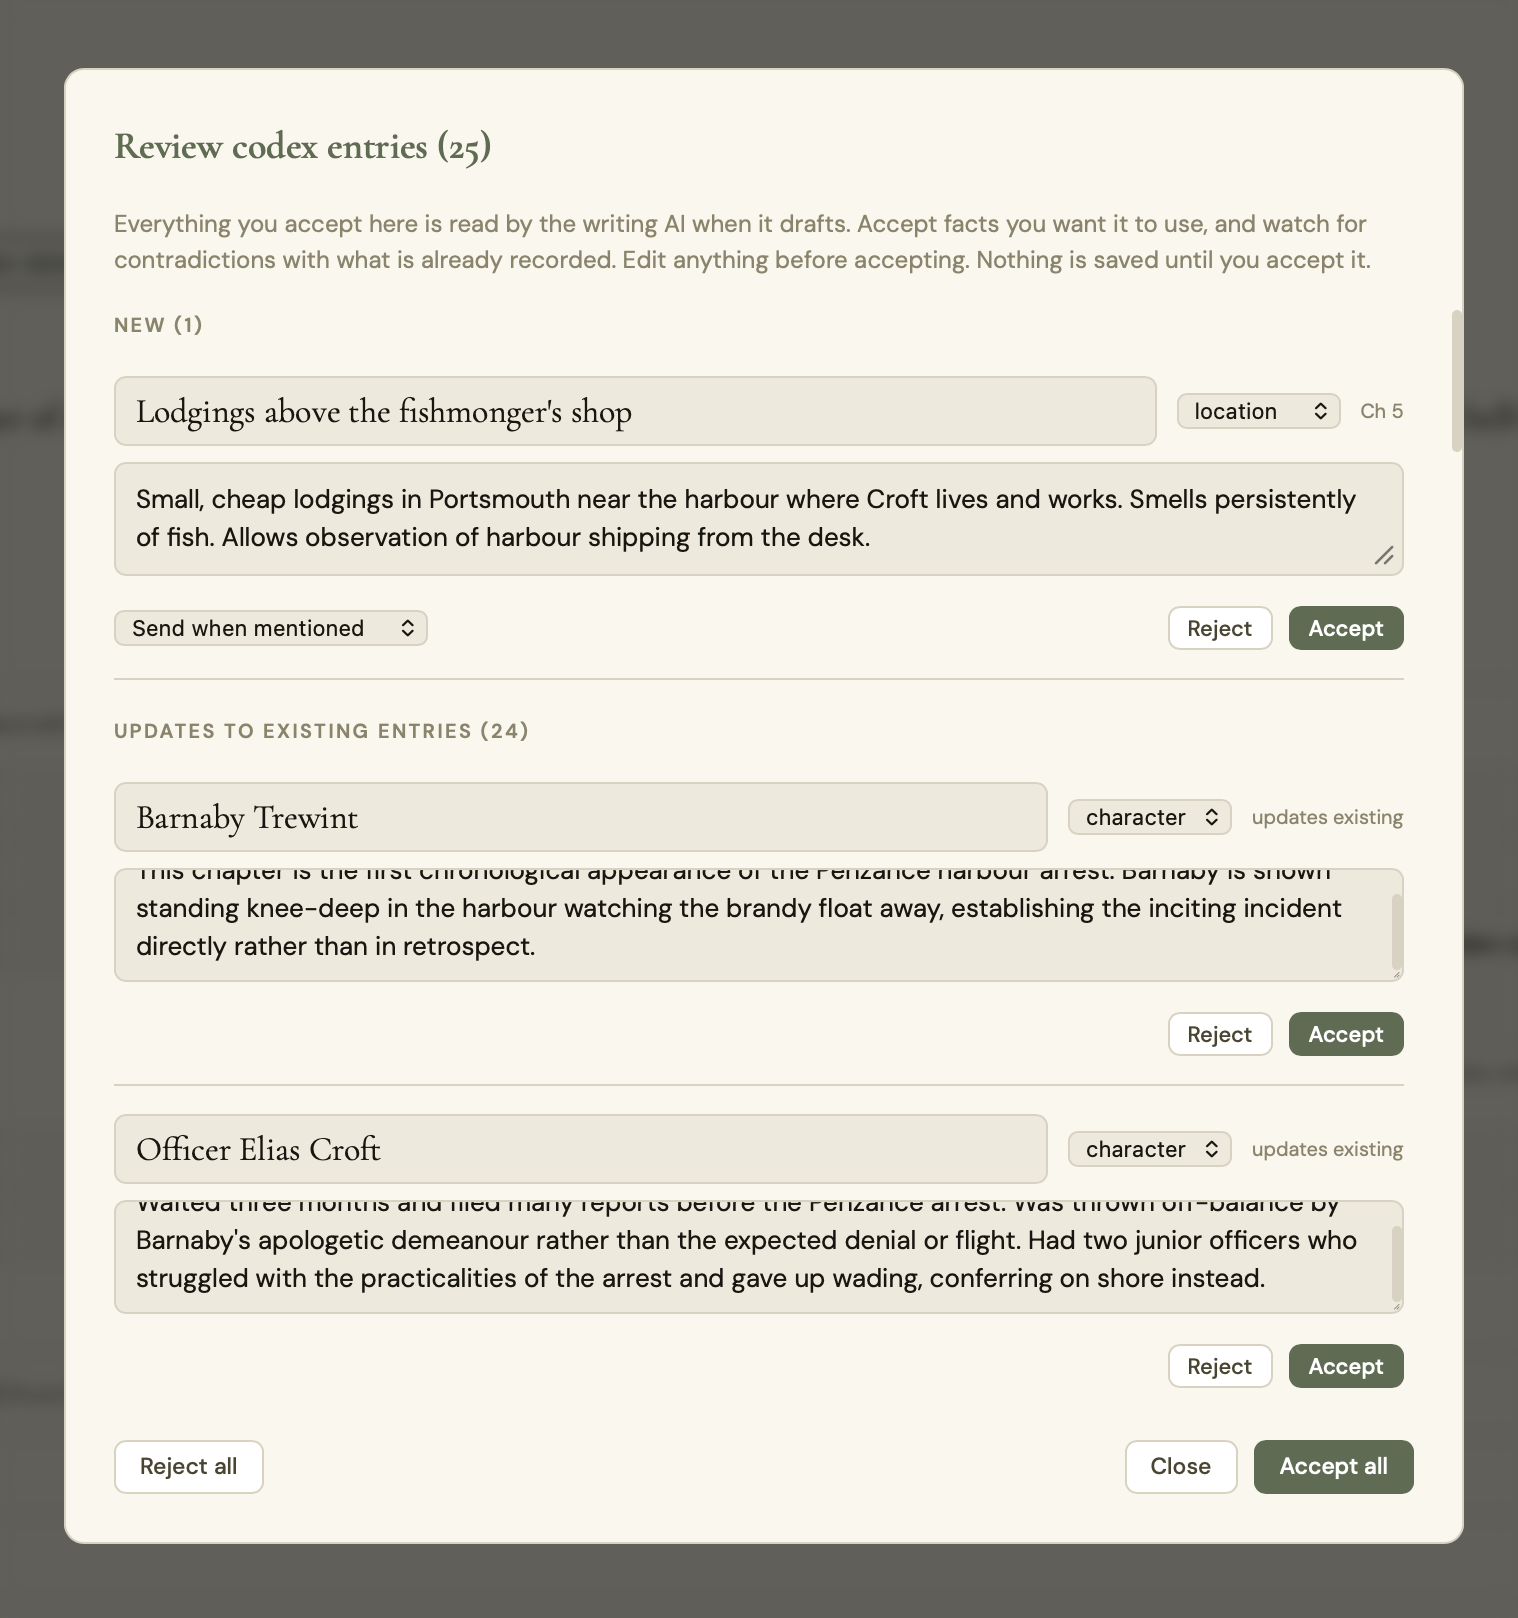
The review queue
Suggestions don't touch your Codex. They wait in the review queue, shown as a "N suggestions to review" pill. Open it and they're sorted into two groups: New entries and Updates to existing entries. For each one you can edit the name, type and description in place, then Accept or Reject it. There's an Accept all and a Reject all if you'd rather move fast.
Two details worth knowing, because they explain the section that follows:
- Accepting a new entry adds it to your Codex, defaulting to "Send when mentioned" unless you change it in the row.
- Accepting an update appends the new text to the existing entry's description. It does not replace what's there. So updates accumulate, which is good for building a picture and bad if you accept things you haven't read.
- Conflict flags. When a scan thinks a new fact contradicts something already recorded, the row carries a "May contradict existing" note. That's your cue to look closely before accepting.
The risk of accepting everything
The review queue is fast, and "Accept all" is tempting. But accepting every suggestion without reading it is the main way a Codex goes wrong, and because the Codex feeds the writing AI, a messy Codex quietly degrades your drafts. Here's what tends to happen, and the fix for each:
| What goes wrong | Why it matters | The fix |
|---|---|---|
| Duplicate entries | A scan proposes "Barnaby" as new when "Barnaby Trewint" already exists. Accept it and you have two records for one person. Both can be sent to the AI, which now sees a split, contradictory picture. | Add the shorter name as an alias on the main entry, then delete the duplicate. |
| Appended contradictions | Updates append rather than replace. Accept a flagged conflict and the entry ends up saying a character's eyes are green and blue. The AI reads both and may blend or pick wrong. | Read the "May contradict existing" badge. Edit the description before accepting, or reject the update. |
| Description bloat and stale facts | Every accepted update lengthens the description. Facts you've since changed linger unless you prune. That's heavier context, higher cost, and an AI anchored to old detail. | Open the entry now and then and tidy the description back to what's true now. |
| Noise entries | One-off walk-ons and incidental objects become tracked entries and start riding into chapters, wasting context, worst on small local models. | Reject them at review, or set them to "Never send". |
| Over-broad names | An entry named Will, Hope or The Bridge auto-detects on ordinary words and gets injected into chapters that never feature it. | Turn Auto-detect off for that entry, or reserve "Send always" for the few that truly matter. |
None of this needs much effort. Review in small batches, read the conflict flags, and spend ten seconds on anything that updates an entry you care about. That's the whole discipline.
When to scan
You don't need to scan constantly. Each scan costs one AI call per chapter, and re-scanning a chapter you haven't touched just re-proposes things you've already judged. Scan when there's something new to read:
- Right after importing a manuscript. The single highest-value scan. It seeds the Codex from your existing prose in one pass.
- After drafting with Auto-scan off, or after writing or heavily editing a chapter by hand.
- After a round of revisions, to catch facts that changed: a renamed character, a moved location, a rule you reworked.
- From the brief, before you write a word. The Editor can offer to seed your Codex straight from the project brief, so your core cast exists before chapter one.
If Auto-scan new drafts is on and you're drafting normally, you may rarely press Scan at all. It's there for imports, hand-written chapters, and catching up after big changes.
Writing a series
If you're writing the second (or third, or fourth) book in a series, bookmoth can carry context forward from previous books. The easiest way to set this up is through the Editor.
When you start a new project, tell the Editor it's a sequel. Something like "this is book 2 in a series" or "I'm continuing from my previous novel" is enough. The Editor will ask you about what happened in the previous book, the world you've established, any continuing plot threads, and which characters are returning. It populates the series context fields and returning characters for you automatically.
You don't need to fill anything in manually. Just have the conversation and the Editor does the rest.
If you prefer to do it yourself, expand the Series Context card in the Brief tab and enable it. You'll see three text fields:
Starting situation: where things left off at the end of the last book. What happened, where are the characters now, what's unresolved.
World and rules: anything established in previous books that still applies. Magic systems, political structures, geography, social dynamics.
Continuing threads: plot threads, relationship dynamics, unresolved tensions, or promises to the reader that carry across books.
Returning characters are managed in the Codex. Add characters from previous books with their descriptions, and they're visible to the AI when drafting.
Windows notes
bookmoth is independent software, not distributed through the Microsoft Store. Windows will show a SmartScreen prompt the first time you run it. This is normal for any new, independently distributed application.
To install: click More info on the SmartScreen prompt, then click Run anyway.
bookmoth is safe, built on open-source infrastructure, and stores everything locally on your machine.
Troubleshooting
Things go wrong sometimes. Here's what's likely happening when they do.
The model stops before finishing
When a chapter rewrite or a long generation comes back cut off, the AI model has hit its own output limit. Different providers and tiers have different caps on how much they'll write in one response.
What to try:
- Use shorter chapters. Splitting a 4,000-word chapter into two 2,000-word chapters often works around the limit.
- Check your provider's max output setting. Some providers (OpenRouter, Zhipu, others) let you raise the cap in their dashboard or by upgrading your plan.
- Try a different model. Different models, even on the same provider, can have very different output limits. Anthropic's Claude models can typically write a full chapter in one response.
The model refuses to write something
Some AI models are trained to refuse content they classify as sensitive. This can include anything involving violence, illness, sex, drugs, politics, religion, or other flagged topics, even when it's part of a novel or memoir. The refusal often shows up as a generic "I can't help with that" message, or something like "this content is sensitive, please try a new topic."
This isn't bookmoth blocking your work. It's the AI model you've connected.
What to try:
- Try a different model. GLM and some restricted Llama variants tend to be the most aggressive about refusals. Mistral, Mixtral, and uncensored Llama variants (Hermes, Dolphin) are typically more permissive. Anthropic's Claude handles the full range of literary fiction including dark themes.
- Rephrase what you're asking for. Sometimes a small change in how a note or instruction is worded gets a different result. Not always, but worth a try.
- Split the chapter into smaller passages and edit them one at a time. Some filters fire on context size as much as content.
Connection or provider errors
If you see a "provider error" message, the AI service itself returned an error. Common causes:
- Invalid API key. Re-check the key you've pasted in bookmoth's API settings.
- Wrong endpoint URL. Most OpenAI-compatible endpoints end in
/v1/chat/completions. The setup sections above show the correct URL for each provider. - Model name unrecognised. The model field needs to match the exact ID your provider uses (e.g.
zhipu-ai/glm-5, notglm5orGLM-5). - Rate limit hit. Wait a minute and try again. If it's persistent, your provider may be limiting you due to high usage or low balance.
- Network issue. Check your internet connection.
Getting help
If you run into anything, email support. It goes directly to Stu, the founder. You'll get a real answer, usually the same day.